Understanding Masks
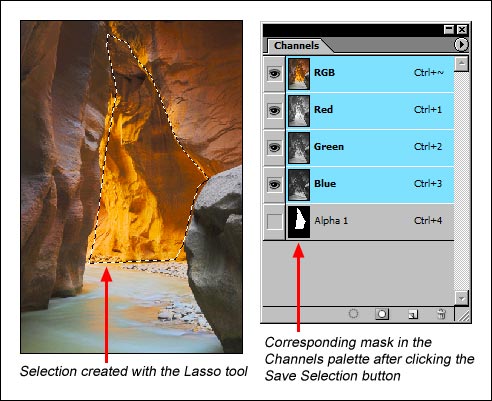
To appreciate the usefulness and uniqueness of this mask and other luminosity masks, it's important to understand exactly what masks are and how they work. Selections are normally created in Photoshop using the Marquee, Magic Wand, and Lasso tools. Typically these selection tools create pure black and white masks. That is, if you were to hit the "Save selection" button on the Channels palette after using one of these selection tools, the mask would be filled with only pure black and pure white with sharply defined edges. Blurring, feathering, and anti-aliasing can introduce some gray tones for a less abrupt transition, but for the most part, the mask remains mostly all black and white (Figure 5).

Masks are routinely used in combination with layers in Photoshop, and the rule for masks is that "white reveals and black conceals." Pure white in the mask allows the corresponding pixels on the layer to be completely visible in the image. Pure black on the mask blocks the corresponding pixels on the layer from appearing in the image. It's important to understand that the blocking effect of black in the mask only occurs on the layer to which the mask is applied. If pixels are blocked from appearing on one layer, Photoshop sequentially looks down to the layers below to find unblocked pixels it can display. Black areas of the mask essentially tell Photoshop to look lower in the layer stack for what the pixel should look like. Shades of gray in a mask allow pixels to appear in the image in proportion to how light or how dark the gray value is. A mask that is 50% gray, for example, allows pixels on that layer to be visible in the image at half their normal opacity. Photoshop will have to find the other half from unblocked pixels deeper in the layer stack. Darker gray values in the mask allow proportionally less of the layer to show and lighter gray values proportionally more.
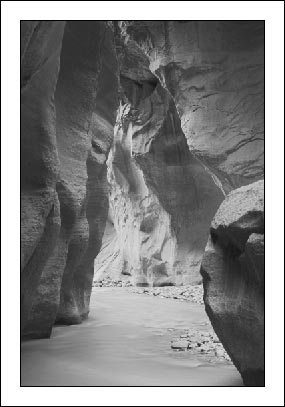
So now let's take a closer look at the "Lights" luminosity mask that was created. By clicking on the thumbnail image of the "Lights" channel or on the word "Lights" to the right of the thumbnail, the mask itself is now visible on the main image area in Photoshop (Figure 6). You can see that it is a perfect grayscale positive of the image and contains very little pure white and pure black. It is composed of shades of gray that perfectly mirror the brightness values in the image. As such, when this mask is applied to an adjustment layer, it will reveal the effect of the adjustment most on the brightest pixels in the image (white reveals) and proportionally less as the pixels get darker (black conceals). This leads to one of the most important properties of luminosity masks: they are completely self-feathering. The effect on the image will be obvious, but there will be no way to tell where the effect begins and where it ends. There are no hard edges like with Photoshop's selection tools and no need to try and make a perfect selection. Because the luminosity mask was created from the image itself, it has the perfect gradation of shades to insure that each and every pixel will be affected in exact proportion to its brightness.
