The Basic Mask—"Lights"
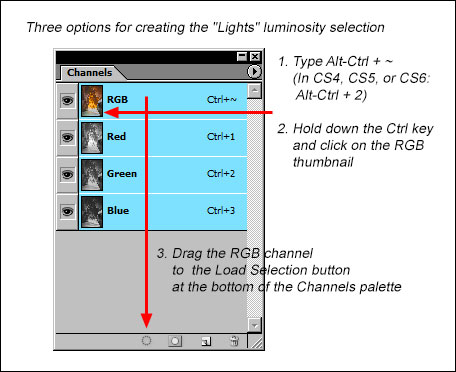
Luminosity masks are nothing more than selections based on the brightness values, more accurately referred to luminance, of the image. The basic luminosity mask, called "Lights", selects pixels in proportion to their brightness in the image. There are three different ways to create this basic luminosity mask (Figure 1). I'll list all three alternatives, but you only need to do one of them to create the selection.
- Type Alt-Ctrl+~. Hold down the Ctrl and Alt keys and hit the "tilde" which is just to the left of the number "1" key on the US keyboard. If you don’t have a US keyboard, use alternative 2. or 3. If using CS4, CS5, CS6, or PS CC this option is now Alt-Ctr+2.
- Ctrl+click the RGB channel. Hold down the Ctrl key and click thumbnail image of the RGB channel.
- Drag the RGB channel to the Load Selection button at the bottom of the Channels palette.
The marching ants appear on the image to define the selection (Figure 2). Since Photoshop only puts marching ants around pixels that are at least 50% selected, and since this selection is based on the brightness of the image, the marching ants only appear around pixels that are equivalent to 50% gray or brighter. I'll discuss this in more detail later. For now it should be obvious that the marching ants are enclosing the lighter areas of the image.

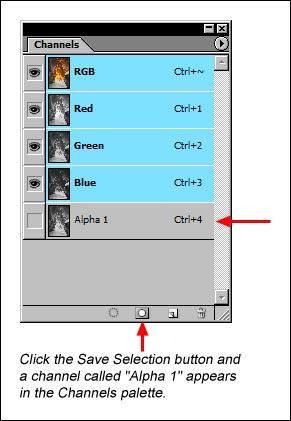
Once you've created the selection of the light areas of the image, it's a good idea to save it. To do this:
- Click the Save Selection button at the bottom of the Channels palette. A channel called "Alpha 1" will appear in the Channels palette (Figure 3).
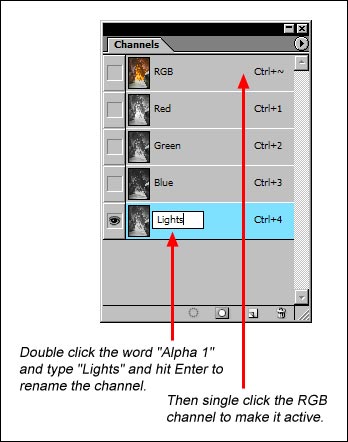
- Double click on the name "Alpha 1" and type "Lights" and then hit the ENTER key to rename this channel (Figure 4).
- Click the RGB Channel to make it active and to restore the color view of the image (Figure 4).
- Type Ctrl+D to turn off the marching ants.
That's it! This is all that's needed to create the luminosity mask for the light areas of the image. It took a bit of writing to explain, but once you try it you'll see how easy it really is.
Technically, what was actually created in the above steps was an alpha channel of the selection. It won't actually be a mask until it's applied to a layer in the Layers palette. However, masks and alpha channels look entirely the same, they just reside on different palettes, so I'll be using the term "mask" to describe both from here on.