Experimentation is the Key
There is no perfect formula for deciding exactly which luminosity mask to create and use. If one mask gets you close to the effect you're looking for but doesn't quite work, you can use one with a wider or narrower range to better hit your target tonalities. Trial and error, like many operations in Photoshop, will always play a role. Working on layers makes experimentation lossless as you can simply discard the layer if it doesn't work. The advantage of using actions to create the masks is that it's relatively quick to generate them for images less than 50 megabytes, though there will be some delay as Photoshop automatically executes the steps in the action.
Adding and subtracting masks allow you many more options for targeting specific tones. The masks work great for pulling detail out of the shadows, and they can be used on pixel-containing layers as well as adjustment layers. I've not personally experimented with Photoshop's High Dynamic Range, but I have used the masks to easily blend the bright and dark areas of two separate pixel-containing layers after conversion of the RAW file to favor the light and dark areas of the image. While Curves adjustments were used for demonstration here, the masks work equally well with other adjustment layers like Hue/Saturation, Levels, and Photo Filter. Inverting a selection from a mask is also an option when you want to target tones that are the opposite of what a mask selects. Just as there are an unlimited number of luminosity masks when you start combining them, there is also an infinite number of ways to apply them to an image.
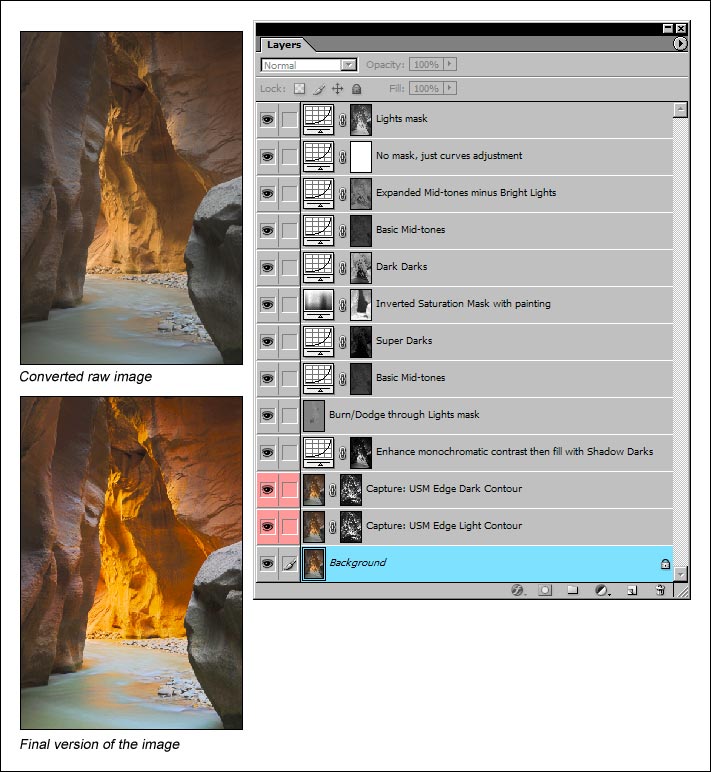
Once you get a feel for what luminosity masks can do, working with them becomes more automatic and quite easy. Figure 16 shows the raw conversion and the final version of the "Zion Narrows" image along with the set of layers needed to achieve the results. The various luminosity masks employed are noted on the labels for the layers. It took a few hours to get this worked out—each layer was only an incremental change towards the final image—but the final image definitely captures my impression of the place much better than what the camera offered.(Note: A downloadable version of this Photoshop image file is now available in the Examples section. It will allow you to take a closer look at the masks for each layer and the adjustments through the masks.)
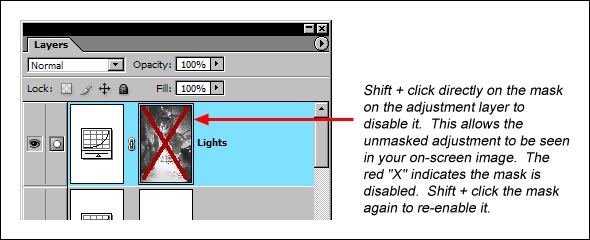
One trick to help you appreciate the way a luminosity mask confines adjustments to specific tonalities is to disable the mask and watch the effect on the image. You disable the mask with a Shift+click on the mask itself on the adjustment layer (Figure 17). A red "X" appears over the mask when it's disabled. Without the moderating influence of the mask, the full force of the adjustment becomes visible. One thing you'll find when using the masks is that you can generally make much more dramatic adjustments, like the backwards "Z" Curves adjustment through the "Basic Mid-tones" mask in Figure 14. Disable the Basic Mid-tones mask there and the image becomes garishly unacceptable. As you experiment with luminosity masks, don't be afraid to push harder than you normally would on your adjustments to see what happens, especially if the mask contains a lot of black and dark shades of gray. Making more extreme adjustments will also help you appreciate the smooth blending that the masks facilitate.